
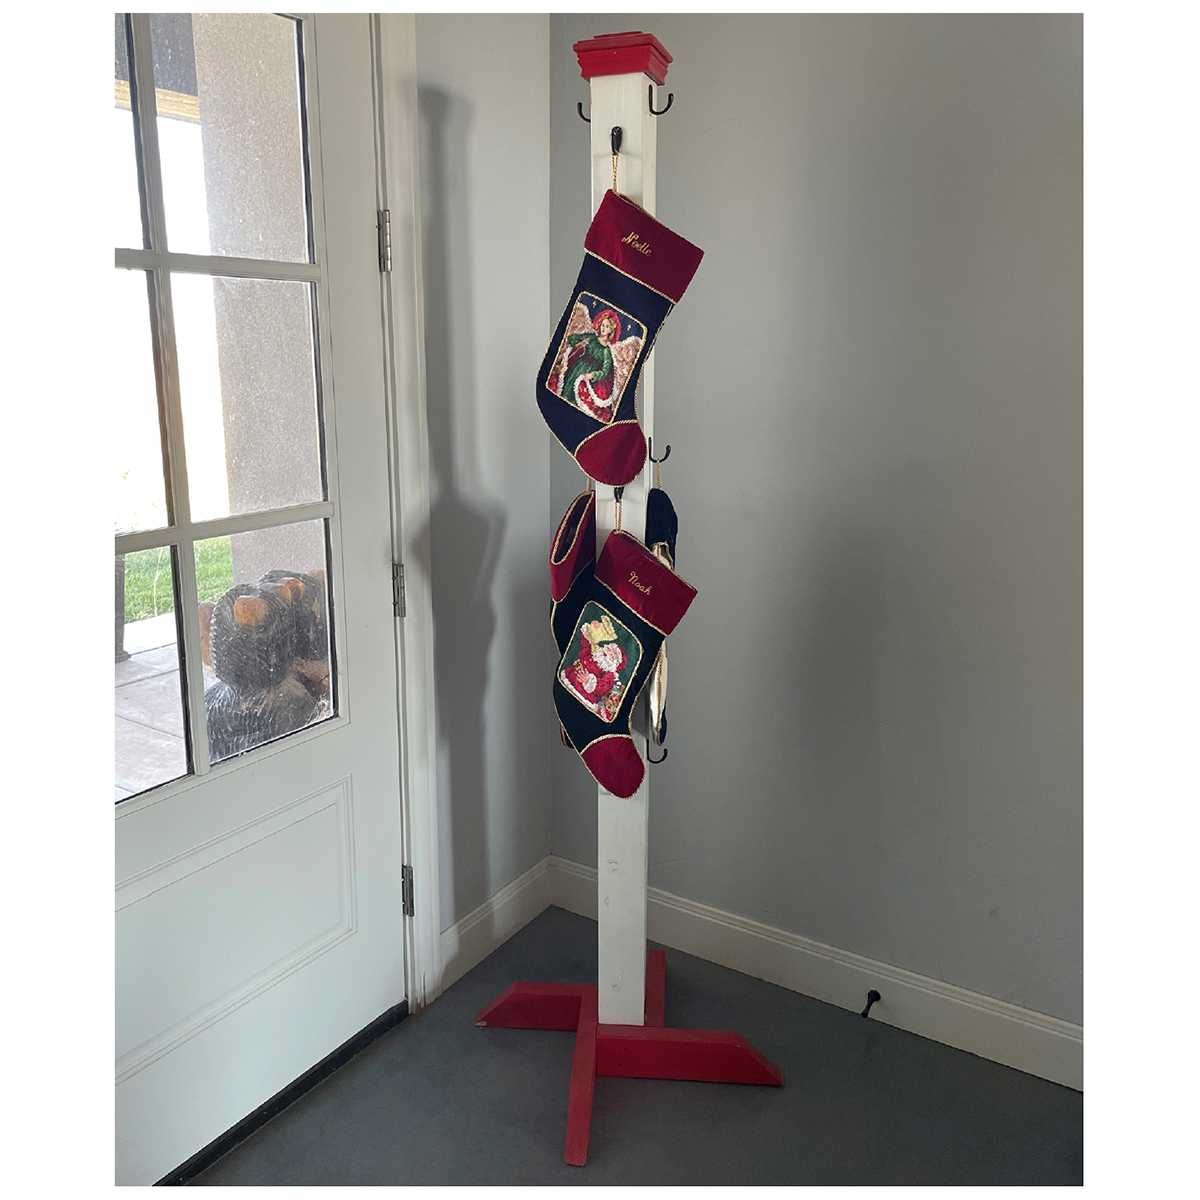
Let’s hear some holiday cheer for this wooden stocking holder! This piece of functional decor is the perfect spot for you to showcase the family stockings or for guests to hang their coats.
Materials:
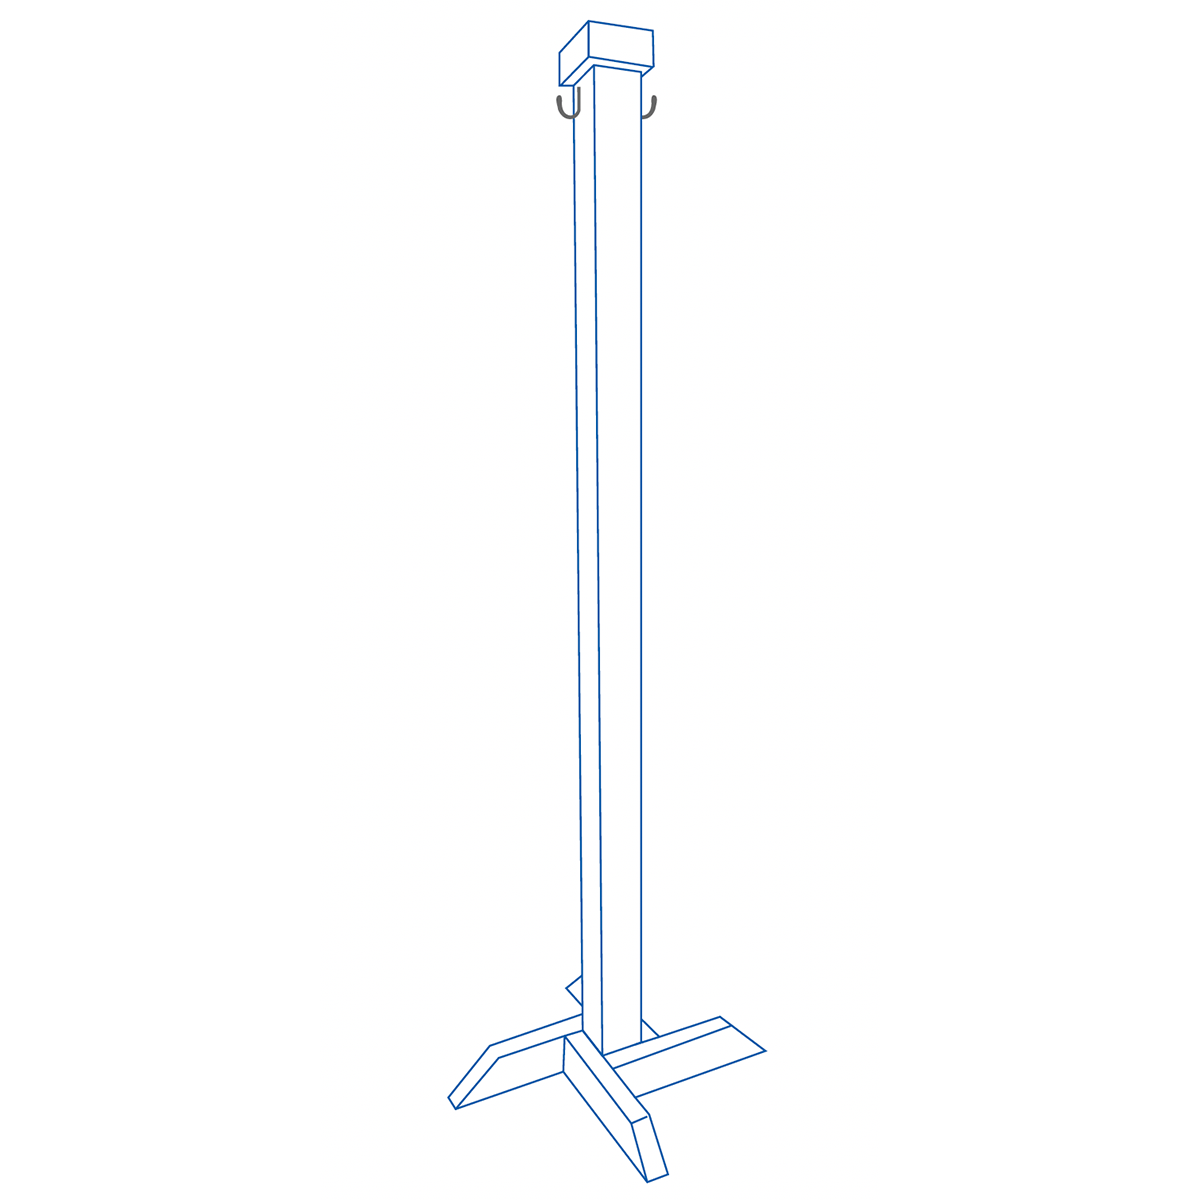
- (1) 6 ft. 4″ x 4″ post
- (1) 4″ x 4″ cap
- (1) 2″ x 4″ (8 ft.)
- Hooks
- Paint
Recommended Tools:
- Bauer 12″ Dual-Bevel Sliding Compound Miter Saw (Item 57151)
- Bauer 20v HYPERMAX™ Lithium-Ion Cordless5″ Random Orbital Sander (Item 64943)
- Bauer 20v HYPERMAX Lithium-Ion Cordless 1/2″ Drill/Driver (Item 56725)
- Bauer 20v HYPERMAX Lithium-Ion 3.0 Ah High Capacity Battery (Item 64816)
- Bauer 20v HYPERMAX Lithium-Ion Rapid Charger (Item 63529)
- Bauer Titanium Drill Bits (Item 64198)
- Bauer Driving Bits (63910)
Follow These Steps:
- Cut the 2″ x 4″ in four 2 ft. pieces.
- Using the Bauer Miter Saw, set your blade to a 45° bevel and cut off the end of each 2 ft. piece.
- Alternating the cut boards around the base of your 4″ x 4″ post, use the Bauer 20v 1/2″ Drill Kit to screw the baseboards on to the post. You can fill these with wood filler for a cleaner look.
- Attach your 4″ x 4″ cap to the top of your post for a decorative look.
- Now that your holder is assembled, sand down any rough texture with the Bauer 20v Random Orbital Sander and a variety of sanding discs.
- You are now ready to paint! Paint your piece as you please.
- Once dry – screw in hooks and you are ready to hang stockings, coats, and more!
See all of Harbor Freight’s DIY project instructions at hf.tools/diy. With Harbor Freight Tools, you can do it yourself!


You must be logged in to post a comment.