
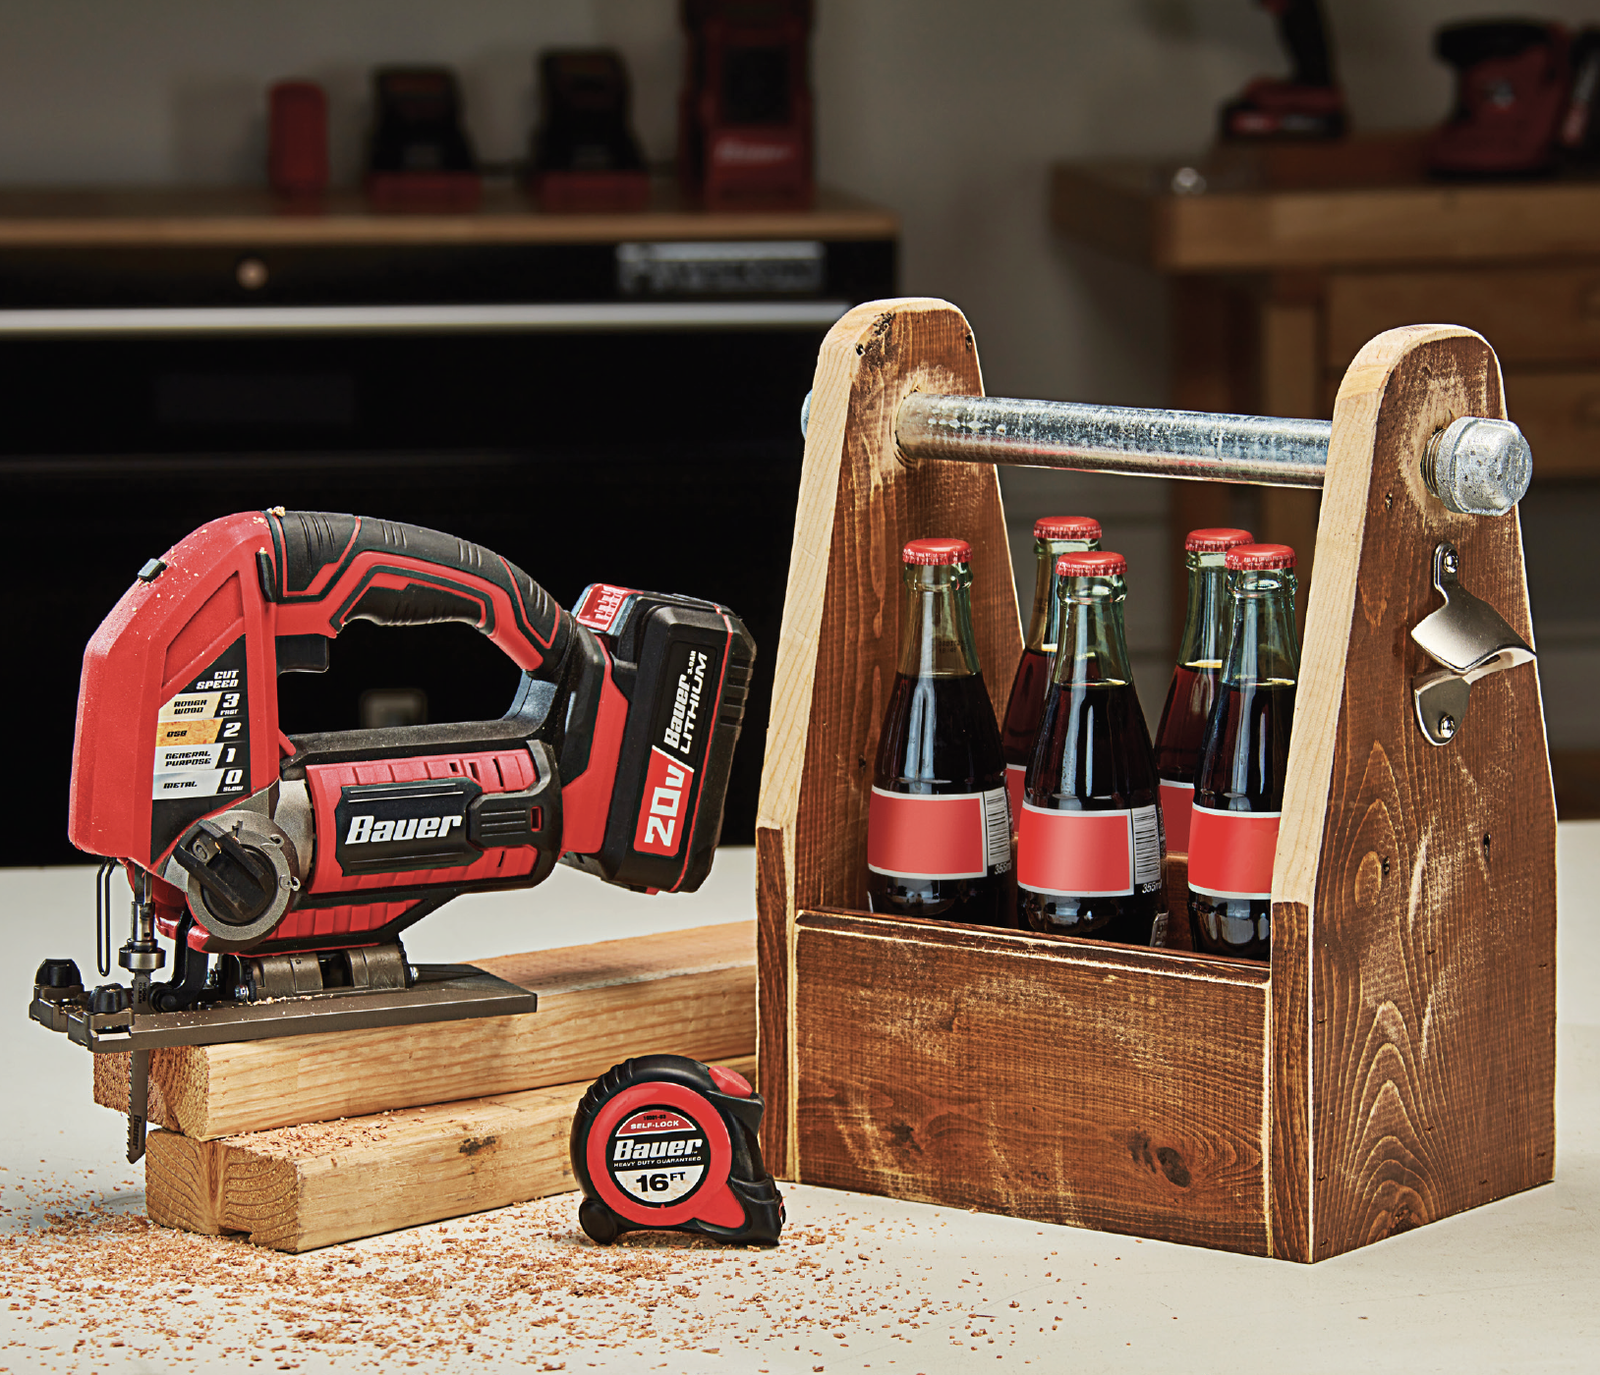
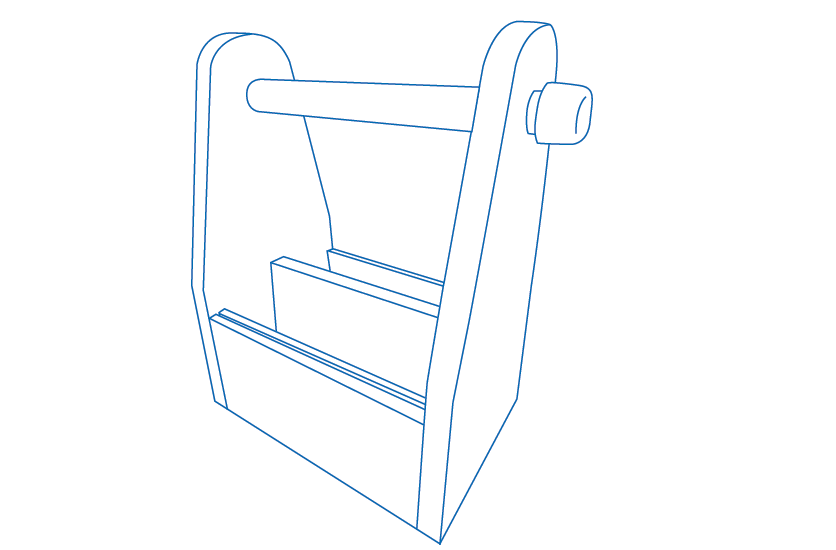
The DIY beer & bottle caddy makes for an excellent gift, or a fun addition to home, garage or man cave decor. This step-by-step guides makes building your very own 6-pack drink caddy an easy and fun project for anyone!
Materials:
- 1. (1) 1″ x 8″ x 96″ Board (Actuals 3/4″ x 7-1/4″)
- (1) 3/4″ x 12″ Galvanized Steel Pipe (Threaded)
- (2) 3/4″ x 1″ Iron Pipe Cap (Threaded)
- (1) Bottle Opener (Screw mount)
- (1) Bottle of Wood Glue
- Optional: Wood stain, paint brush
Recommended Tools:
- Bauer 10″ Dual-Bevel Sliding Compound Miter Saw (Item 57179)
- Bauer 11″ 80T Fine Finishing Circular Saw Blade (Item 57089)
- Bauer 20v HYPERMAX™ Lithium-Ion Cordless 5″ Random Orbital Sander (Item 64943)
- Bauer 6.5 Amp Tool-Free Variable Speed Orbital Jig Saw with Laser (Item 64290)
- Warrior T-Shank General Purpose Jigsaw Blade 5 PK (Item 68088)
- Bauer 20v HYPERMAX™ Lithium-Ion Cordless 1/2″ Drill/Driver (Item 56725)
- Bauer Spade Wood Drilling Bit Set 6Pc. [For the 1″ Spade Bit] (Item 64744)
- Bauer 20v HYPERMAX™ Lithium-Ion 3.0 Ah High Capacity Battery (Item 64816)
- Bauer 20v HYPERMAX™ Lithium-Ion Rapid Charger (Item 63529)
- Central Pneumatic 18 Gauge 2-in-1 Air Nailer/Stapler (Item 68019)
- Fastenstrong 2″ 18 GA Galvanized Brad Nails, 1,000 Pc. (Item 64304)
- (2) Pittsburgh 12″ Ratcheting Bar Clamp/Spreader (Item 62123)
Follow These Steps:
- Optional: If you want a similar look to our completed piece, stain the entire board first. Let dry before proceeding.
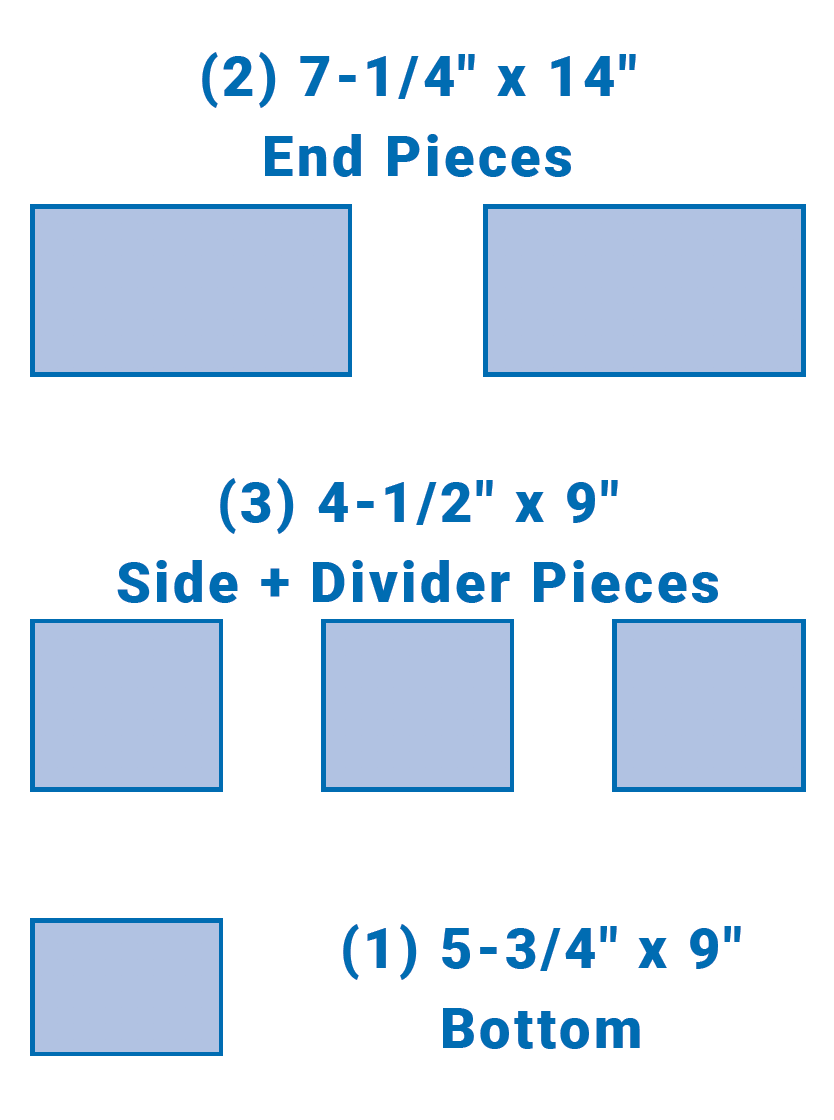
- Using the 1″ x 8″ x 96″ board (actual is 3/4″ x 7-1/4″ x 96″) length-wise into the follow sizes: a. (2) 14″ long sections (end pieces) b. (4) 9″ long sections (bottom, sides)
- Next, cut (1) 9″ piece down to 5.75″ WIDE -leave 9″ long. This will be your bottom/base.
- Then cut (3) 9″ pieces to 4.5″ inches wide. Leave 9″ long. These will be the sides & middle divider.
- Use the sander to sand the edges as desired to expose fresh wood if stained.
- Test fitment of all of the pieces – make sure that the (4) pieces that are 9″ long match in length – sand to match if needed.
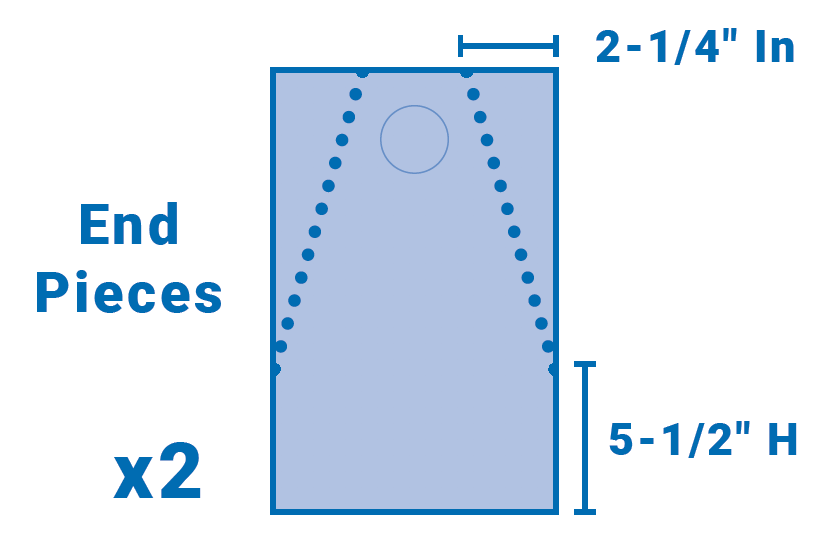
- Next, measure 5.5″ up each long side of the 7-1/4″ x 14″ end pieces and mark them. Then go to the opposite end and measure 2-1/4″ in from the outer edge on each side and make a mark. Now use a straight edge to connect the marks, this will give you the cuts to make the ends taper inward at the top. Make these cuts with the jig saw or a sliding miter saw.
- Now measure 1.5″ down from the top center of each end piece, Use the pipe cap to trace a circle with the top of the cap 1.5″ down from the top. Use this to drill out a 1″ hole to feed the pipe through. Do this on both end pieces. Insert pipe and attach caps.
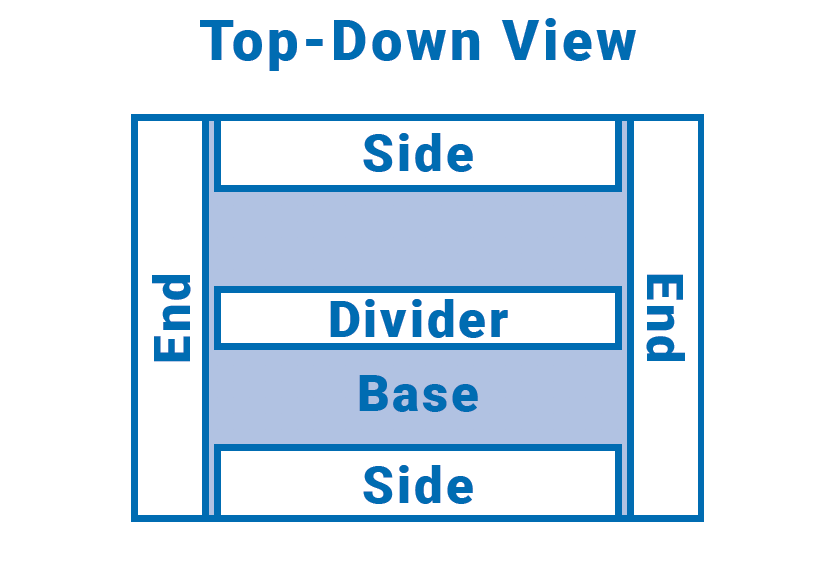
- Begin assembly. Test fi t all pieces, using clamps to hold ends to base. If fi tment is satisfactory, disassemble and apply glue to bottom & side pieces and place ends and sides against bottom. Brace with clamps.
- Add glue to ends of middle divider, place between end pieces, centered. Allow all pieces to dry for recommended time on glue bottle.
- Using nail gun, nail the ends & sides.
- Screw bottle opener onto end piece.
- Fill with beverage of choice – enjoy responsibly! Share pictures with your friends and family & brag about your new Harbor Freight-inspired DIY 6-Pack Bottle Caddy!

See all of Harbor Freight’s DIY project instructions at hf.tools/diy. With Harbor Freight Tools, you can do it yourself!


You must be logged in to post a comment.