
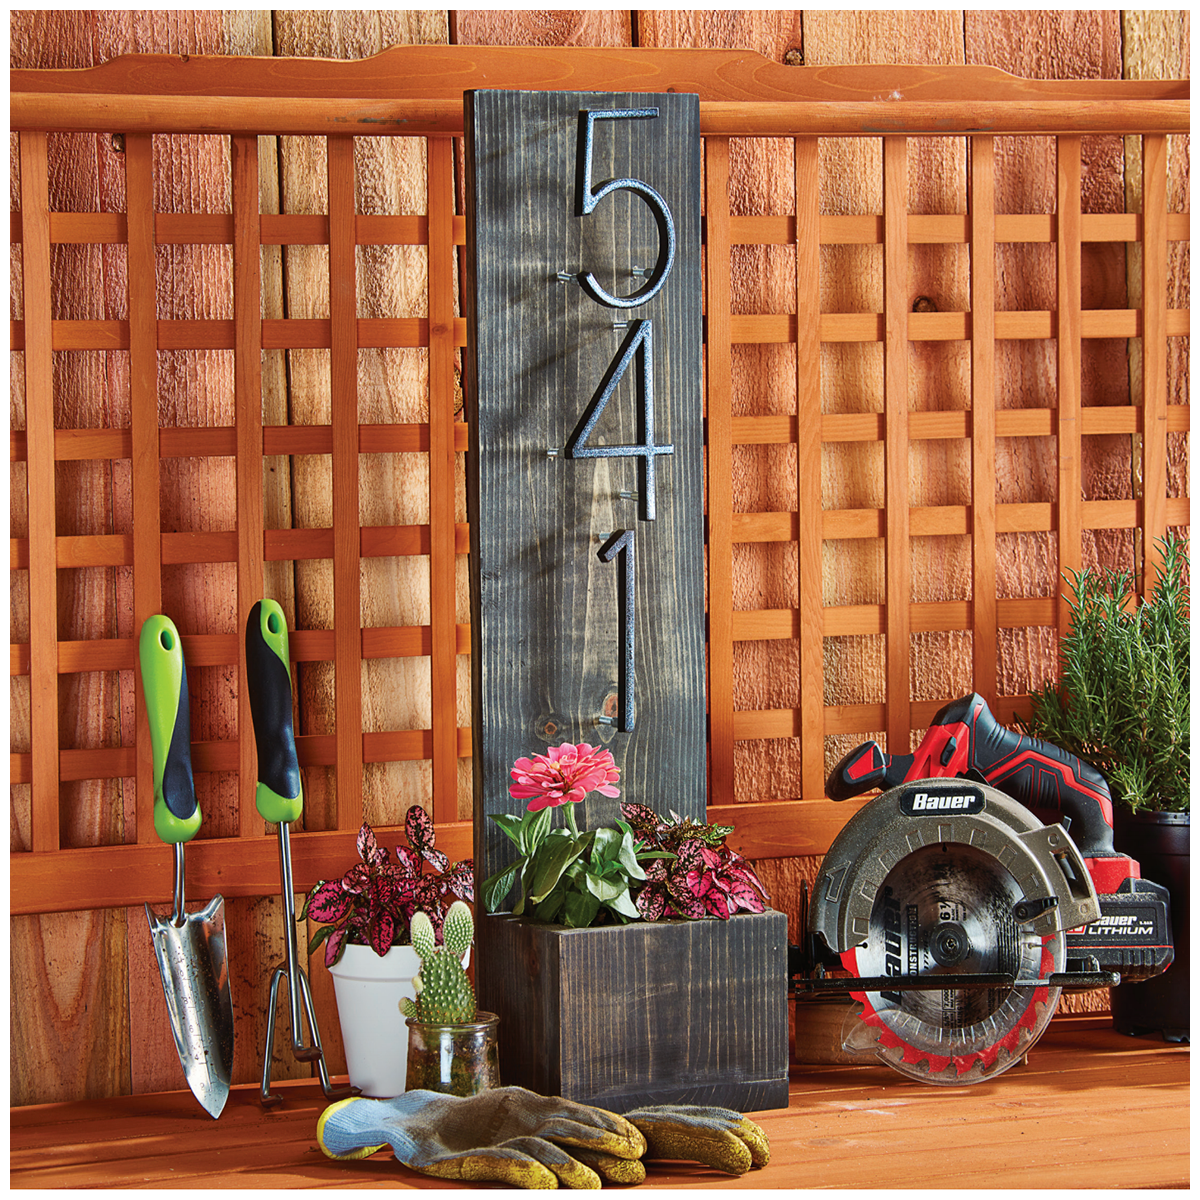
Ring in spring and dress up the entrance to your home with a DIY House Numbers Project that includes a planter box. Guests will be impressed by your bright and welcoming entrance decor where you can boast your favorite seasonal flowers or succulents.
Materials:
- (1) 1″ x 6″ Hardwood Board
- (1) Set of House Numbers of Your Choice
- (1) Qt. of Exterior Wood Stain
- 1-5/8″ Wood Screws
- Paint Brush for Stain
Recommended Tools:
- Bauer 20v HYPERMAX Lithium-Ion Cordless 6-1/2″ Circular Saw (Item 63634)
- Bauer 20v HYPERMAX Lithium-Ion Cordless 5″ Random Orbital Sander (Item 64943)
- Bauer 20v HYPERMAX Lithium-Ion Cordless 1/2″ Drill/Driver (Item 56725)
- Bauer 20v HYPERMAX Lithium-Ion 3.0 Ah High Capacity Battery (Item 64816)
- Bauer 20v HYPERMAX Lithium-Ion Rapid Charger (Item 63529)
- Bauer Titanium Drill Bit Set, 21 Pc. (Item 63911)
- Bauer Impact Drill And Driver Bit Set, 35 Pc. (Item 63910)
- Bauer 6-1/2 In. 24T Framing Circular Saw Blade (Item 63907)
Follow These Steps:
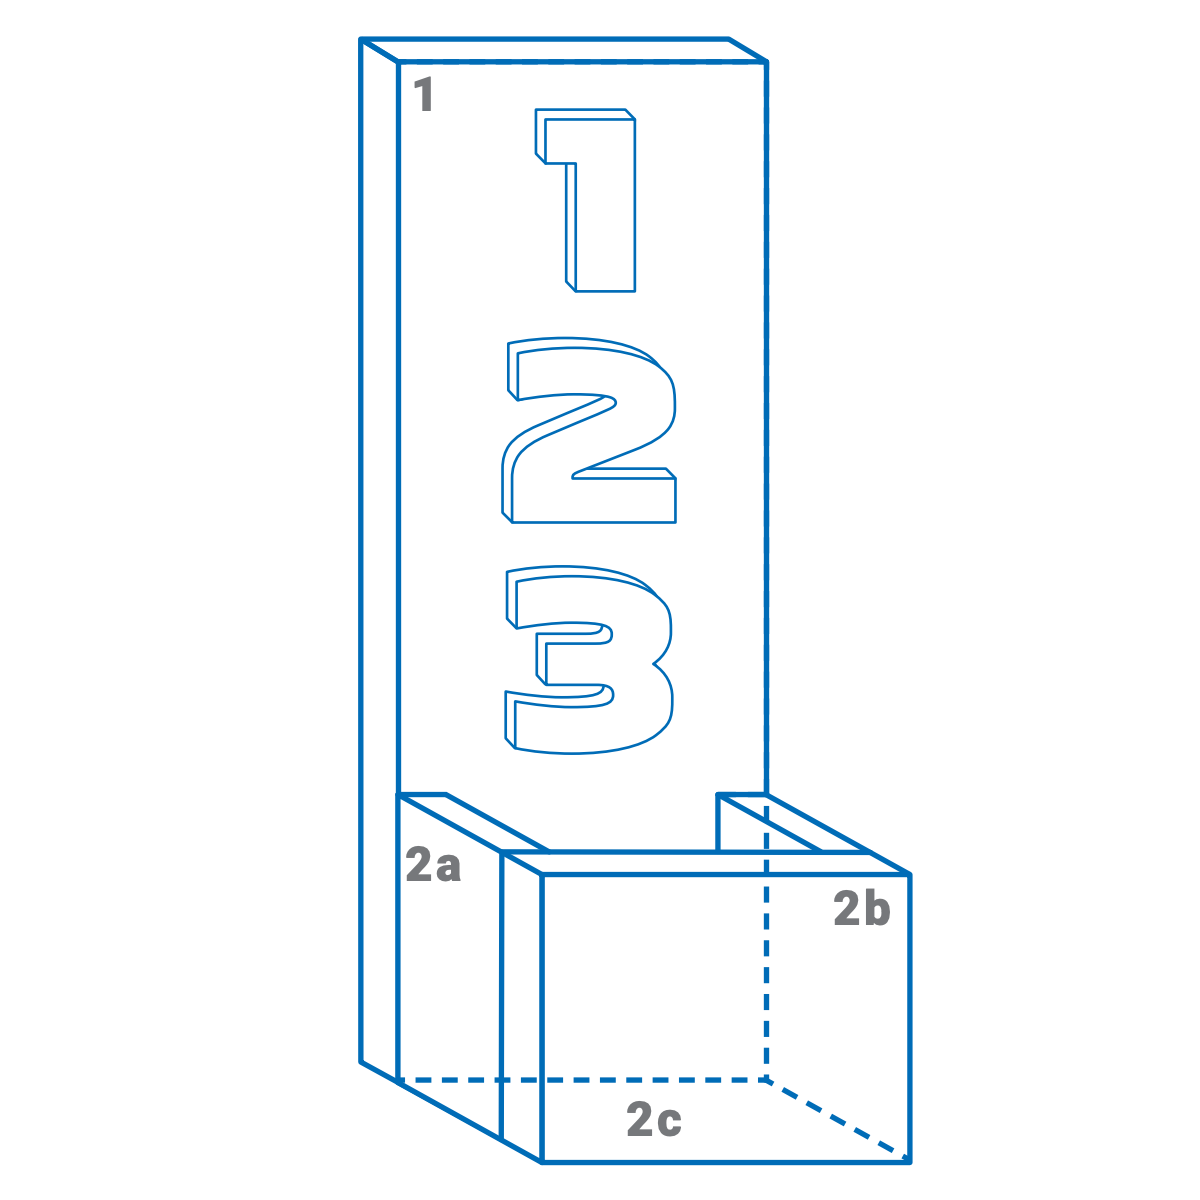
- Using a 1″ x 6″ hardwood board, cut to your desired length. We recommend 25″ for three numbers, and 30″ for four numbers.
- Using the rest of your 1″ x 6″, cut the pieces for the planter box. You will need:
- a. ( 2) 4″ x 4″ pieces
- b. (1 ) 4″ x 7-1/2″ piece
- c. (1 ) 4″-3/4″ x 7-1/2″ piece
- Sand all of your wood pieces to have clean edges using a random orbital sander and 100 grit sandpaper.
- Using the Bauer Titanium Drill Bit Set (Item 63911), drill your pilot holes for assembly, spacing your holes 1-1/2″ apart.
- Using 1-5/8″ wood screws, assemble your wood pieces.
- Clean your assembled project and apply a stain if desired.
- Once your project has been stained and dried, install your house numbers using the specified instructions.
- Mount the hardware that is appropriate for the material your project will be attaching to.
See all of Harbor Freight’s DIY project instructions at hf.tools/diy. With Harbor Freight Tools, you can do it yourself!


You must be logged in to post a comment.