Step 1 – Wash & Dry the Vehicle
Before polishing, it is essential to remove loose contaminants and clean the surface so that it can be inspected and an appropriate action plan can be established. To do this, it is best to first perform a wash using a car wash like Meguiar’s Gold Class Shampoo & Conditioner (SKU 56806), combined with a wash mitt such as the HFT 2-In-1 Microfiber Chenille Wash Mitt (SKU 60304).

Next, dry the vehicle with a drying towel Grant’s 6 Sq. Ft. Premium XL Plush Drying Towel (SKU 64312). PRO TIP: Use the dark grey side of the towel when drying the paint, and flip to the light grey side for windows. You will find that the towel dries better this way, and glides easier over glass.”

Step 2 – Decontaminate the Vehicle
Once the vehicle is clean and dry, evaluate the paint for embedded contaminants such as overspray, sap or industrial fallout & oxidation. To do this, simply take a plastic sandwich bag and some water and then place your hand inside the bag and rub the paint – if you feel bumps, then you should use a clay bar like Meguiar’s C2000 Mild Detailing Clay (SKU 56858) paired with the spray lubrication Meguiar’s M34 Final Inspection (SKU 56860) to remove the contamination and make the paint smooth.

This step is essential as these contaminants can both detract from the color and gloss of the vehicle, but it can also interfere with later steps including compounding, polishing or even waxing.

(Click image to zoom-in and see example of fallout on paint)
Step 3 – Inspect the Paint
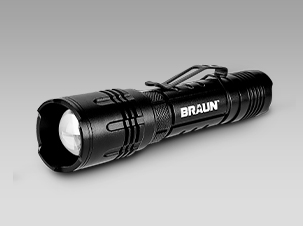
Next, you want to inspect the paint to determine the level and types of defects such as dull oxidation, swirls, scratches or marring. To do this, either pull the vehicle into direct sun light and look around the reflection of the sun on the paint, or inside by using a dedicated light such as the Braun Professional Rechargeable Color Match Light (SKU 56354). PRO TIP: For lighter colors and metallic colors, it is sometimes easier to spot defects in a dark garage with a single source of light as overwhelming bright ambient light can hide defects.
If you see considerable swirls and scratches, you will benefit most from at least one step of paint correction using a compound, polish, or both. If the paint looks glossy and with minimal to no swirls and you are happy with how it looks, you can go straight to adding your protection.

Step 4a – Choosing the Right Polisher
If paint correction is needed, it is recommended to select a Random Orbital / Dual Action polisher for beginners, or a Variable Speed Rotary Polisher for those experienced with those machines. Either style machine can effectively remove defects – but Variable Speed / High Speed Polishers / Buffers are generally best suited for experienced individuals as they remove paint more quickly, and can be more difficult to finish down swirl-free.


Depending in your budget, as well as the size and shape of your vehicle, either the Bauer 8mm Random Orbital 6 In. DA Polisher/Sander (SKU 64528) or the Bauer 20mm Long-Throw Random Orbital DA Polisher (SKU 56367) are excellent choices for the beginner or seasoned enthusiast looking to safely to remove the defects and restore the paint to high gloss. Unsure which is right for you? Watch this video.
Step 4b – Choosing the Right Pads
Next, you will want to select your pads to go with your polisher. If you are using a Random Orbital / Dual Action Polisher from Harbor Freight, you will want to stick with the foam pads in the 6” size. If you chose a rotary or variable speed 7” polisher, you will want to use 7-9” pads.
For severe defects we recommend pairing the Bauer Coarse Foam Polishing Pad (BLUE, SKU 56549) with Meguiar’s M105 Ultra-Cut Compound. For moderate defects, the Bauer Medium Foam Polishing Pad (GREEN, 56547) paired with Meguiar’s Dual Action Cleaner/Polish (SKU 62562) makes for an excellent option that often allows for a single step of correction before proceeding to wax or sealant.
If defects are minor, or as Step 2 if removing more severe defects, pair the Bauer Fine Foam Polishing Pad (YELLOW, SKU 56665)with Meguiar’s M205 Ultra Fine Finishing Polish (SKU 62224). In rare cases where paint is abnormally soft or sensitive, it may require switching the Bauer Fine Foam Polishing Pad (YELLOW) for the Bauer Ultra-Fine Foam Polishing Pad (WHITE, SKU 56664).
PRO TIP: It is recommended to have a few of each pad to allow for switching out if they become too dirty, clogged with removed paint, or if they are accidentally dropped on the ground and become contaminated.

Step 5 – Pad Priming, Test Spot & Polishing
Once you have the polisher, pad & product selected and ready, you will want to start by performing what is referred to as “priming the pad.” Priming the pad consists of spreading a thin, even layer of compound or polish on the face of the pad while it is attached to the machine, then placing the face of the pad against the paint and running the machine on speed 3 for 30 seconds with light pressure. This helps to push an equal amount of product into the pores of the foam to avoid inconsistent results or dry contact between the foam and paint.
After performing the pad priming, then add 3 pea-sized drops of the compound or polish near the outer edge of the pad and place the pad back on the paint.

Turn the machine back up and work an area of approximately 2 feet by 2 feet for approximately 30-60 seconds on speed 3-5. Wipe away the residue and inspect the paint – if the defects are removed to a satisfactory level, repeat this process around the vehicle. If the defects are not removed to a satisfactory level, you may need to try a second pass, or a more aggressive combination of tool, pad and product.
PRO TIP: You will also want to make sure you have ample microfiber towels to wipe away any compound, polish (and later, wax) residue. We suggest picking up at least one pack of Grant’s Luxe Finish Microfiber Towels 12 Pack (SKU 63028), or a few of the Grant’s Dual Sided Microfiber Detailing Towel 2-packs (SKU 64283).
Step 6 – Applying Protection
After removing defects on the vehicle, the last step is to apply protection to help protect and maintain that glorious new car shine! For this step, you simply want to select the least aggressive pad or bonnet available – such as the Bauer Ultra-Fine Foam Polishing Pad (WHITE, SKU 56664), and apply a liberal amount of your favorite liquid wax or sealant – such as Meguiar’s Mirror Glaze Hi-Tech Yellow Wax (SKU 62226), or Meguiar’s Mirror Glaze Synthetic Sealant 2.0 (SKU 56853).
Place the pad onto the paint, and proceed to spread the wax or sealant at speed 3 approximately one panel at a time. For wax/sealants, you do not need to work the product in thoroughly – simply spread a thin, even layer over the area until each panel is covered. Allow the product to dry for 2-5 minutes before wiping the excess away with a clean microfiber towel. Repeat for the entire vehicle until done.








You must be logged in to post a comment.